Propresenter Clicker
ProPresenter Clicker lets you remotely preview slides from ProPresenter over your local network. Designed for simplicity, it connects automatically and displays the current audience view — no extra software needed. Just enable network mode in ProPresenter, open your browser, and you’re ready to go.
- 🌟 ProPresenter Clicker – Get Started / Comenzar
- 🛠️ Troubleshooting Connection Issues / Solución de Problemas de Conexión
🌟 ProPresenter Clicker – Get Started / Comenzar
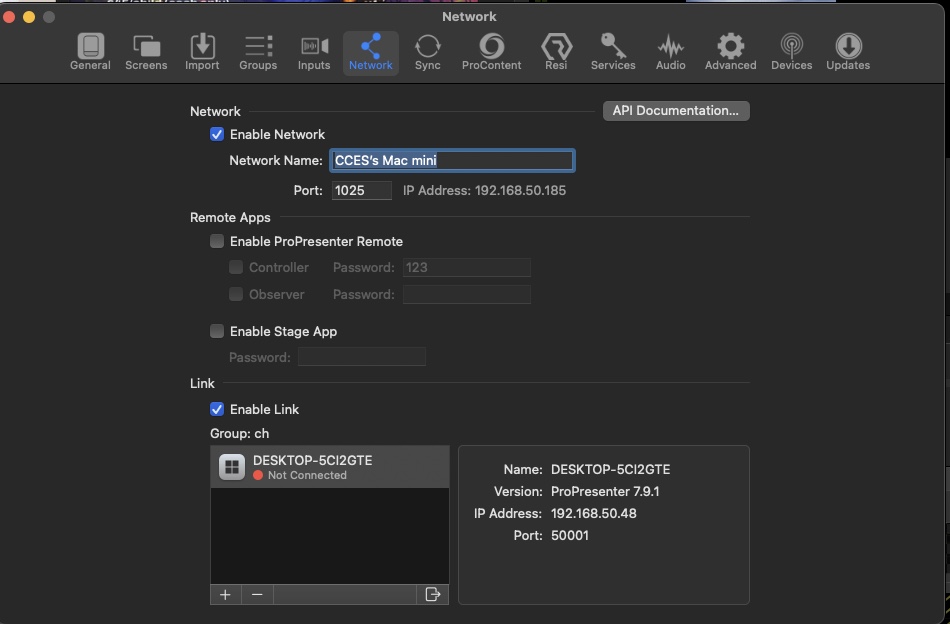
🔧 STEP 1: Enable Network in ProPresenter
Activar red en ProPresenter
EN:
-
Open ProPresenter.
-
Press
⌘ + ,to open Preferences. -
Go to the Network tab.
-
Make sure Enable Network is checked.
-
Confirm Port is set to:
1025.
ES:
-
Abre ProPresenter.
-
Presiona
⌘ + ,para abrir las Preferencias. -
Ve a la pestaña de Red (Network).
-
Asegúrate de que "Enable Network" esté activado.
-
Verifica que el Puerto sea:
1025.
🌐 STEP 2: Connect to ProPresenter
Conectar a ProPresenter
EN:
-
Open your browser.
-
Go to:
👉http://192.168.50.80:10 -
The app will try to auto-connect to ProPresenter.
ES:
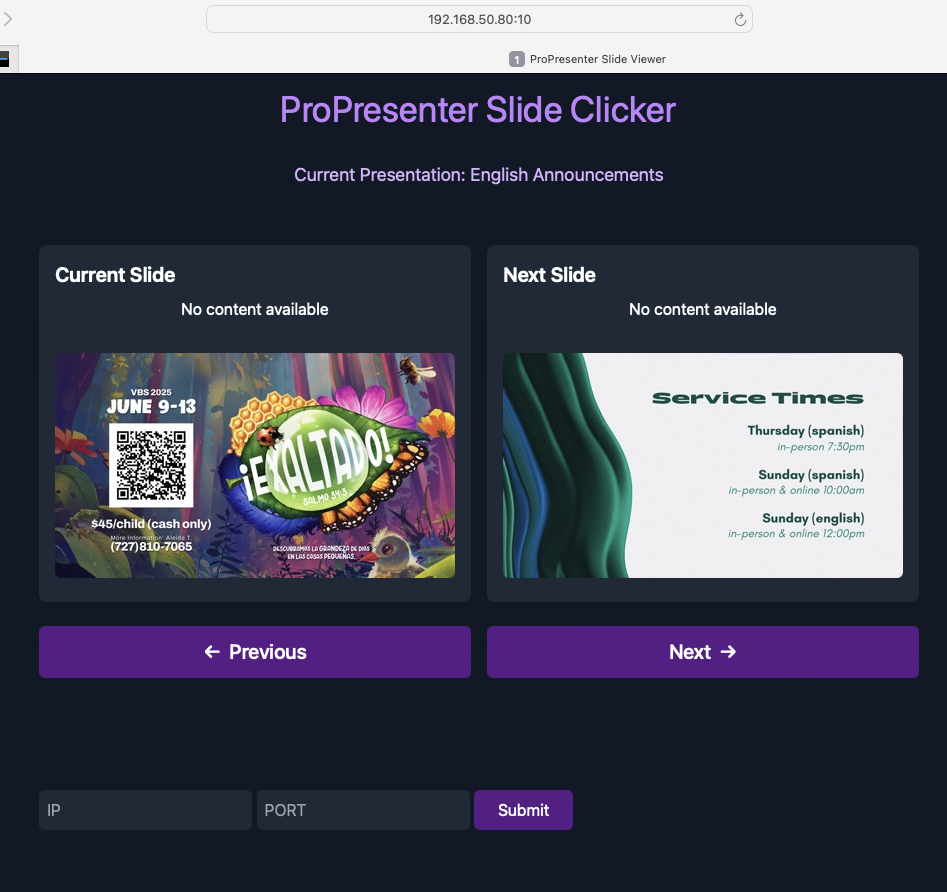
✅ STEP 3: Verify Connection
Verificar Conexión

-
ProPresenter Audience View
-
App preview showing the same image
EN:
-
If connected successfully, you'll see the current Audience Preview image in your browser.
-
If not, try refreshing or wait a few seconds — updates happen at intervals.
ES:
-
Si la conexión es exitosa, verás la imagen actual del Audience Preview en tu navegador.
-
Si no se muestra, intenta recargar o espera unos segundos — la vista previa se actualiza con intervalos.
🛠️ Troubleshooting Connection Issues / Solución de Problemas de Conexión
If ProPresenter Clicker isn’t connecting, follow these steps:
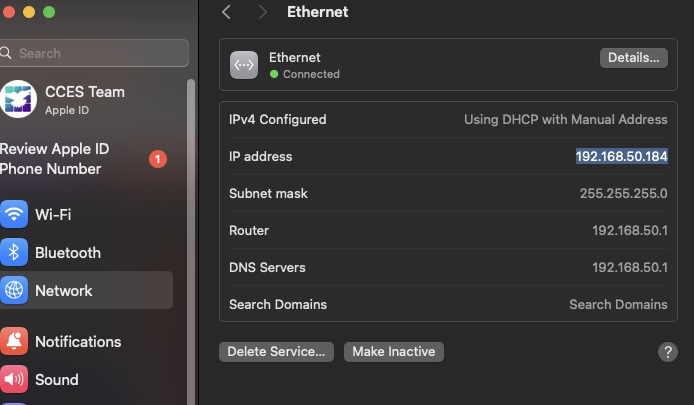
🔍 1. Check the Mac’s IP Address
Verifica la dirección IP de la Mac
EN:
-
Press
⌘ + Space, typeSettings, and hitEnter. -
In Settings, go to Network > Ethernet.
-
Check if IP Address is:
👉192.168.50.184
If it’s different, note the new IP (e.g., 192.168.50.xxx).
ES:
-
Presiona
⌘ + Espacio, escribeConfiguración, y presionaEnter. -
En Configuración, ve a Red > Ethernet.
-
Verifica si la Dirección IP es:
👉192.168.50.184
Si es diferente, toma nota de la nueva IP (ej: 192.168.50.xxx).
🌐 2. Update Connection Info in Browser
Actualiza la información en el navegador

EN:
-
Return to:
👉http://192.168.50.80:10 -
Enter the new IP address (e.g.,
192.168.50.xxx) and the correct port. -
Press Submit.
ES:
-
Regresa a:
👉http://192.168.50.80:10 -
Ingresa la nueva dirección IP (ej:
192.168.50.xxx) y el puerto correcto. -
Haz clic en Enviar.
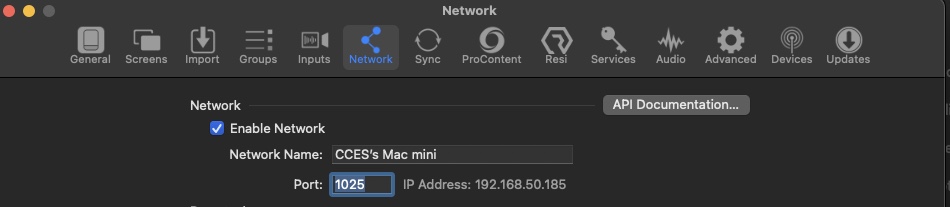
🔢 3. Verify the Correct Port
Verifica el puerto correcto
EN:
-
Open ProPresenter, press
⌘ + , -
Go to the Network tab and check the Port under the Network section.
ES:
-
Abre ProPresenter, presiona
⌘ + , -
Ve a la pestaña de Red (Network) y verifica el Puerto en esa sección.
⚠️ Reminder
Recordatorio
EN:
Refreshing the browser may reset the IP and port to default:
👉 192.168.50.184 and 1025
Be sure to re-enter your settings if needed.
ES:
Al recargar la página, se puede restablecer la IP y el puerto por defecto:
👉 192.168.50.184 y 1025
Asegúrate de ingresar los datos nuevamente si es necesario.